
Highlight is a platform for creating and releasing NFTs, and offers a bunch of special self-serve tooling to support the creation of generative artworks on the blockchain.
Cables.gl is an intuitive way to build generative visual art. It provides a no-code GUI to compose various visual effects by stringing them together, along with random values as inputs.
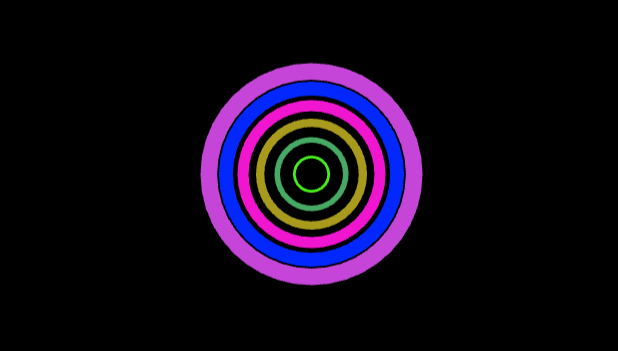
This post describes the steps required to export a cables.gl patch and release it as a generative series on the Highlight platform. We’ll build a simple generative artwork that draws a number of rings corresponding to the order the token was minted in. The number of rings is limited to max 6.
Background
Highlight provides a small JavaScript snippet that can be imported into your generative code, called hl-gen.js. This script provides two important pieces of data:
-
A
random seed, which is deterministic (always the same) for an individual token. We’ll feed this value to our cables.gl patch to create a visual output. -
The
hl.txobject, containing a variety of other information about the mint that can be used as inputs into your work (the mint order, the block timestamp, the minter’s wallet address, and more. Check out the README for more info.).
Step 1: Prepare the patch
First we’ll prepare our cables.gl patch. The patch needs to accept two variables:
-
highlightSeedwhich is of type number and -
highlightTxwhich is of type object.
In the below example we extract the mintIteration value (index of the current iteration within the batch of size mintSize) from the highlightTx variable and use it later to generate the appropriate number of rings.
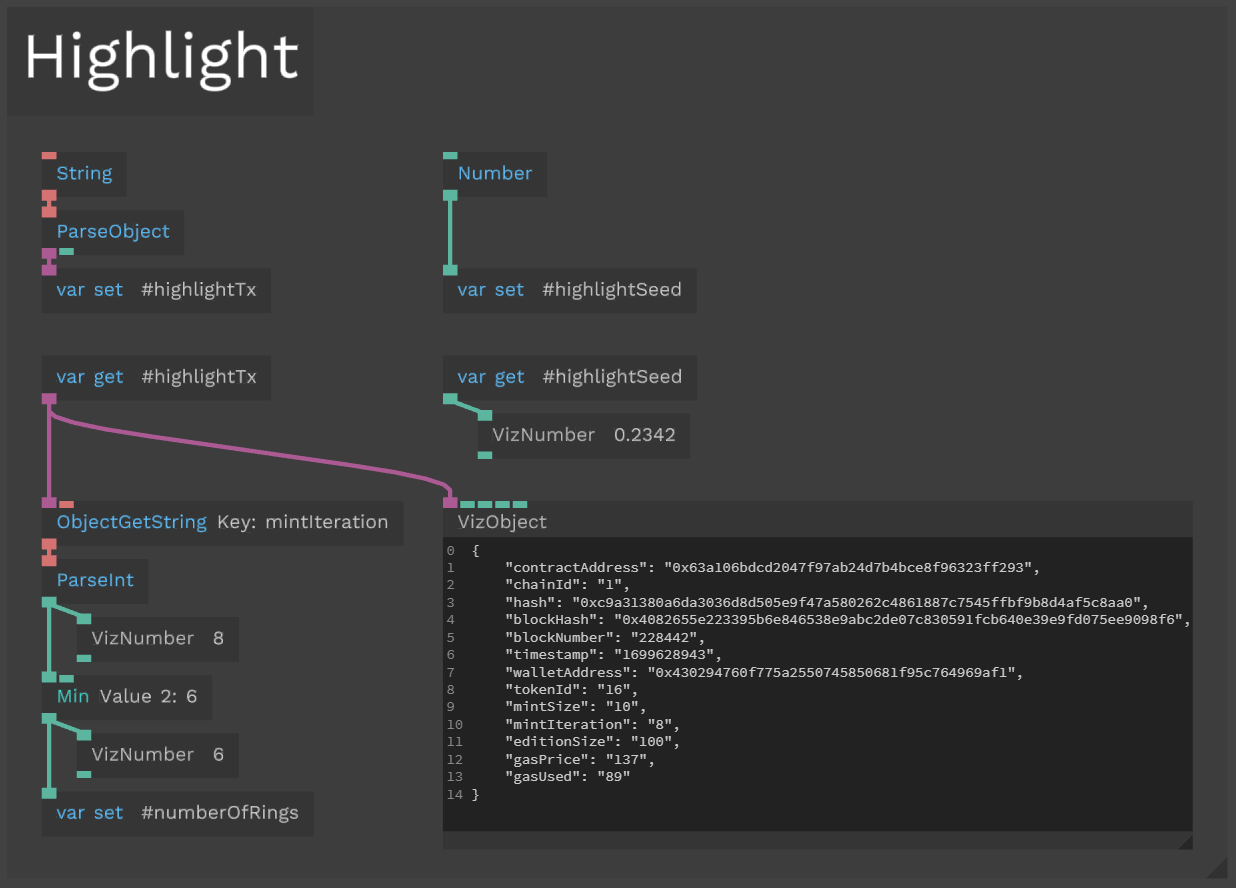
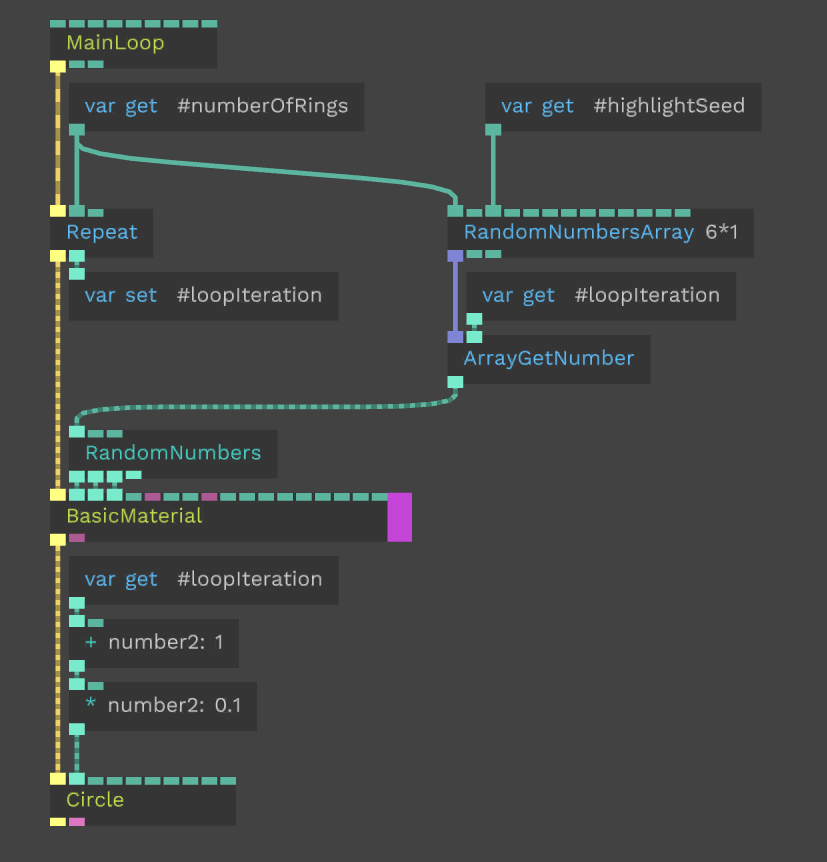
From there we save the mintIteration as the value numberOfRings, which is then used together with the highlightSeed to generate an array of random numbers (RandomNumbersArray op), used as seeds for the color of the rings (RandomNumbers op).
In each loop iteration we extract one value from the random numbers array, generate the color, then draw a ring whose size is proportional to the loopIteration index.
When you’re building your own patches, you can experiment with using these random and dynamic values provided by hl-gen.js to feed into your visuals.
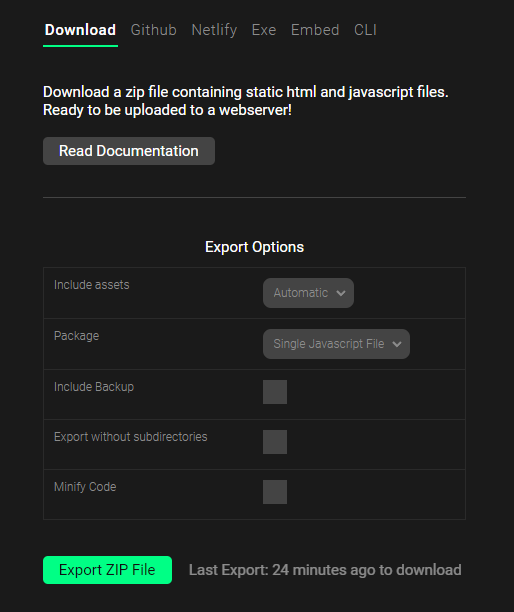
Step 2: Export the patch
When we’re happy with the results, we’ll export the patch using the cables.gl export UI. We’ll extract the zip file and navigate to the folder.
Step 3: Prepare for upload to Highlight
After we extract our zip file we need to do a couple of things.
First, add the hl-gen.js file to the js folder that is inside the exported cables folder. You can use the Download hl-gen.js link on this page: https://github.com/highlightxyz/generative-art
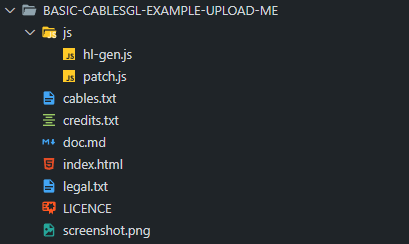
After placing the hl-gen.js file in the js folder we need to do three things:
Open the index.html file and import hl-gen.js above your patch.js file, like this (be sure not to include the async attribute:
<script type="text/javascript" src="js/hl-gen.js"></script>
Add the code that will set the token traits, name and description below the patchFinishedLoading(patch) {…} function:
hl.token.setTraits({
  madeWith: 'Highlight <3 Cables.gl',
});
hl.token.setName(`Example token #${hl.tx.tokenId} made with cables.gl`);
hl.token.setDescription(
  `This is an token generated as part of an example project
   for using hl-gen.js and cables.gl.
   The timestamp of the mint was ${hl.tx.timestamp}.
   The minting wallet address was ${hl.tx.walletAddress}`
);
And finally add the following code below the CABLES.patch = new CABLES.Patch({....}) code that is already present:
// Required for seeding cabels.gl random functions
CABLES.patch.setVariable('highlightSeed', hl.random());
// Access to all hl.tx variables
CABLES.patch.setVariable('highlightTx', hl.tx);
(optional) Trigger the capture of your art programmatically, by adding the following code in the patchFinishedLoading(patch) {…} function:
hl.token.capturePreview();
Putting it all together it should look something like this:
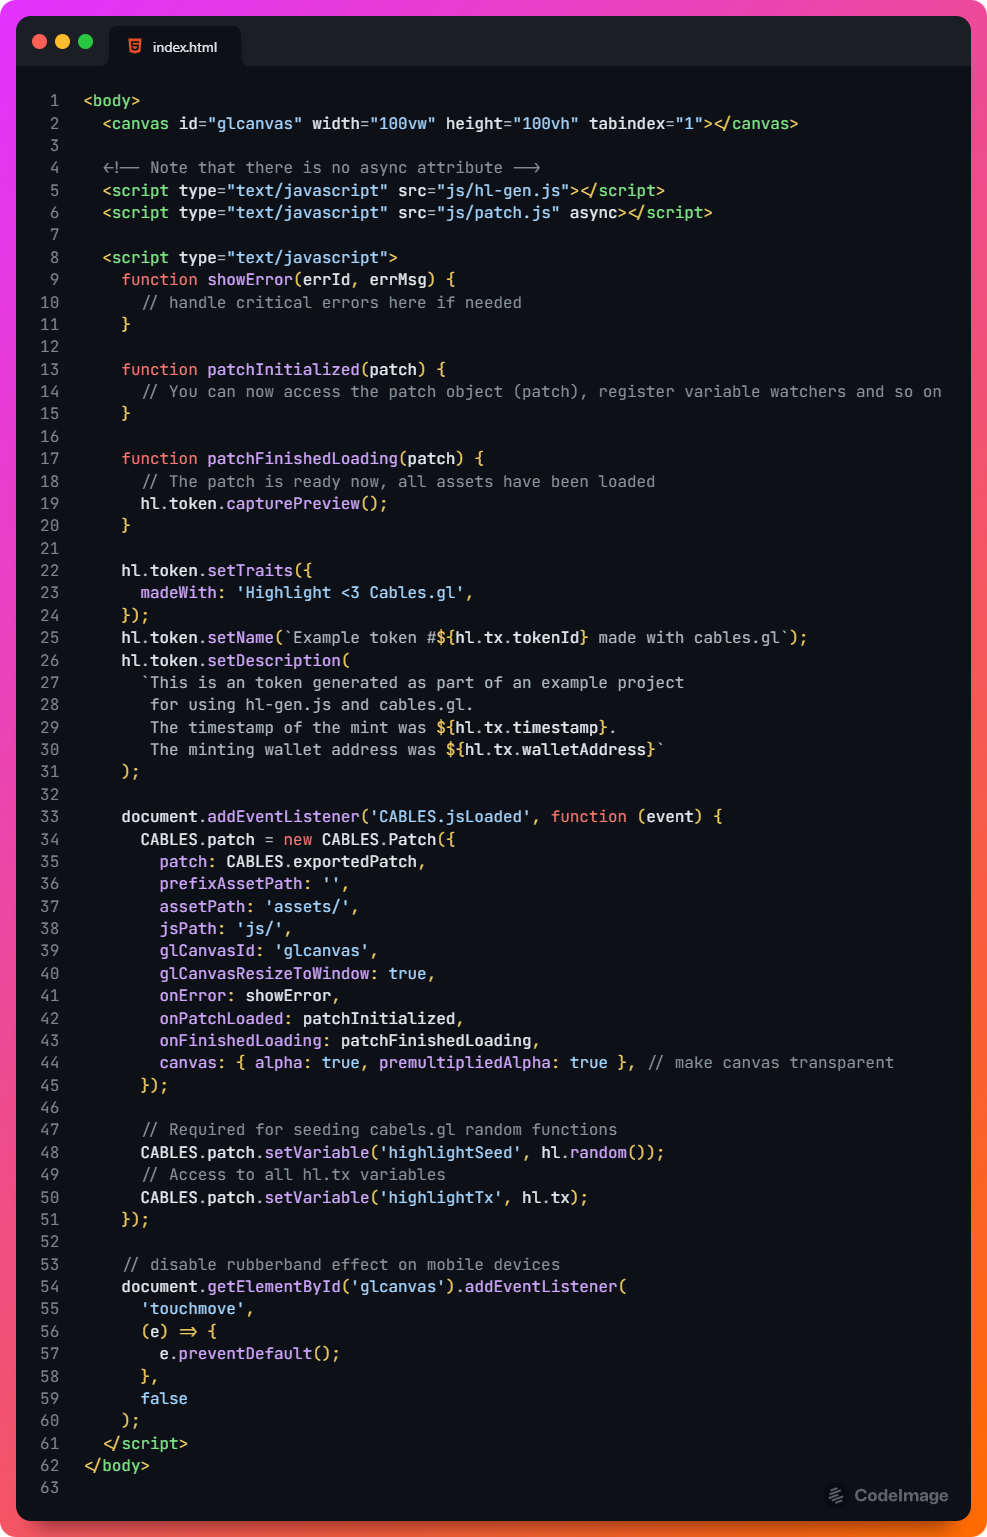
And that is it! 🎉
Now all that’s left to do is to zip the folder and upload it to Highlight. You can click through previews of your code on the Highlight platform to confirm that it’s working, and deploy to testnet to confirm again.
Step 4: Upload to Highlight
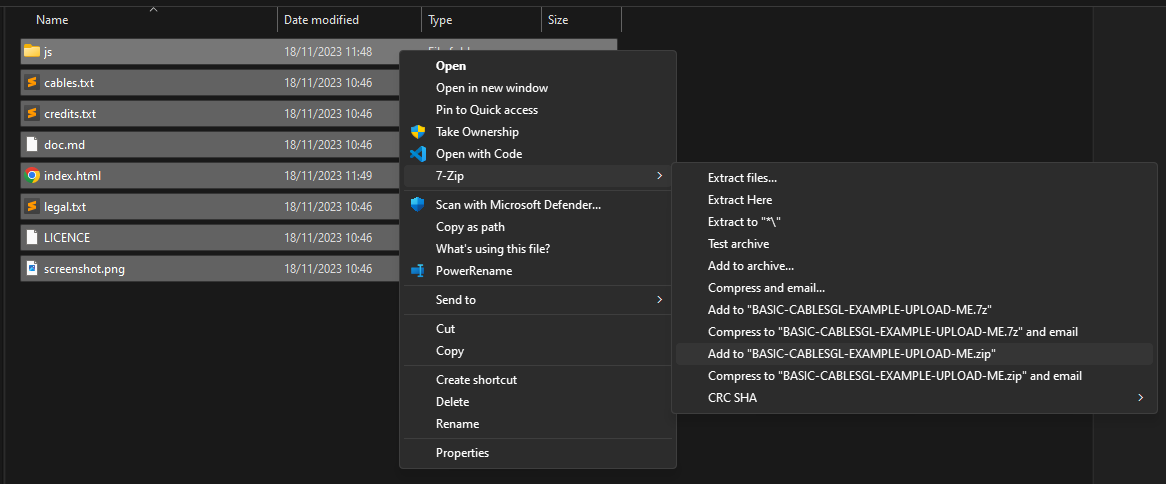
Open your file explorer of choice and navigate to the project. Select all the files, right click and compress. Note that you should select all the files and compress them, not the parent folder.
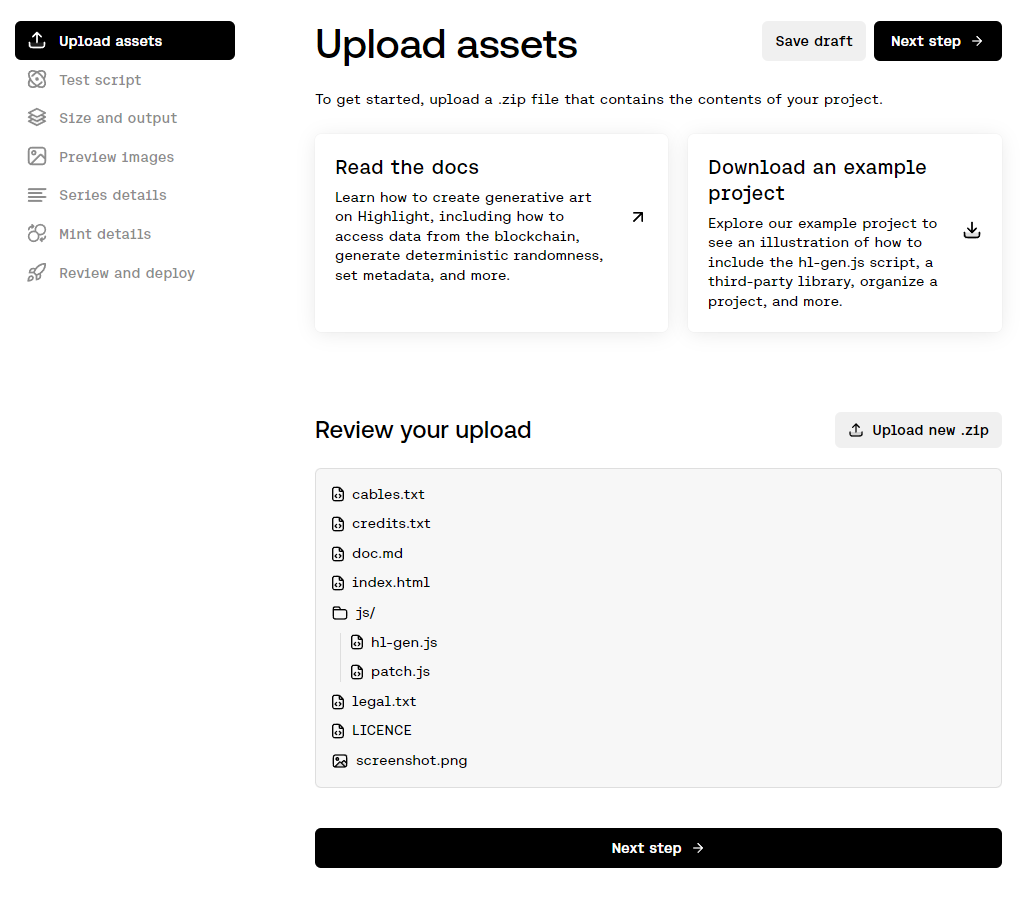
Then use the upload flows on the “Create” section of the Highlight website, selecting “generative series” as your starting point.
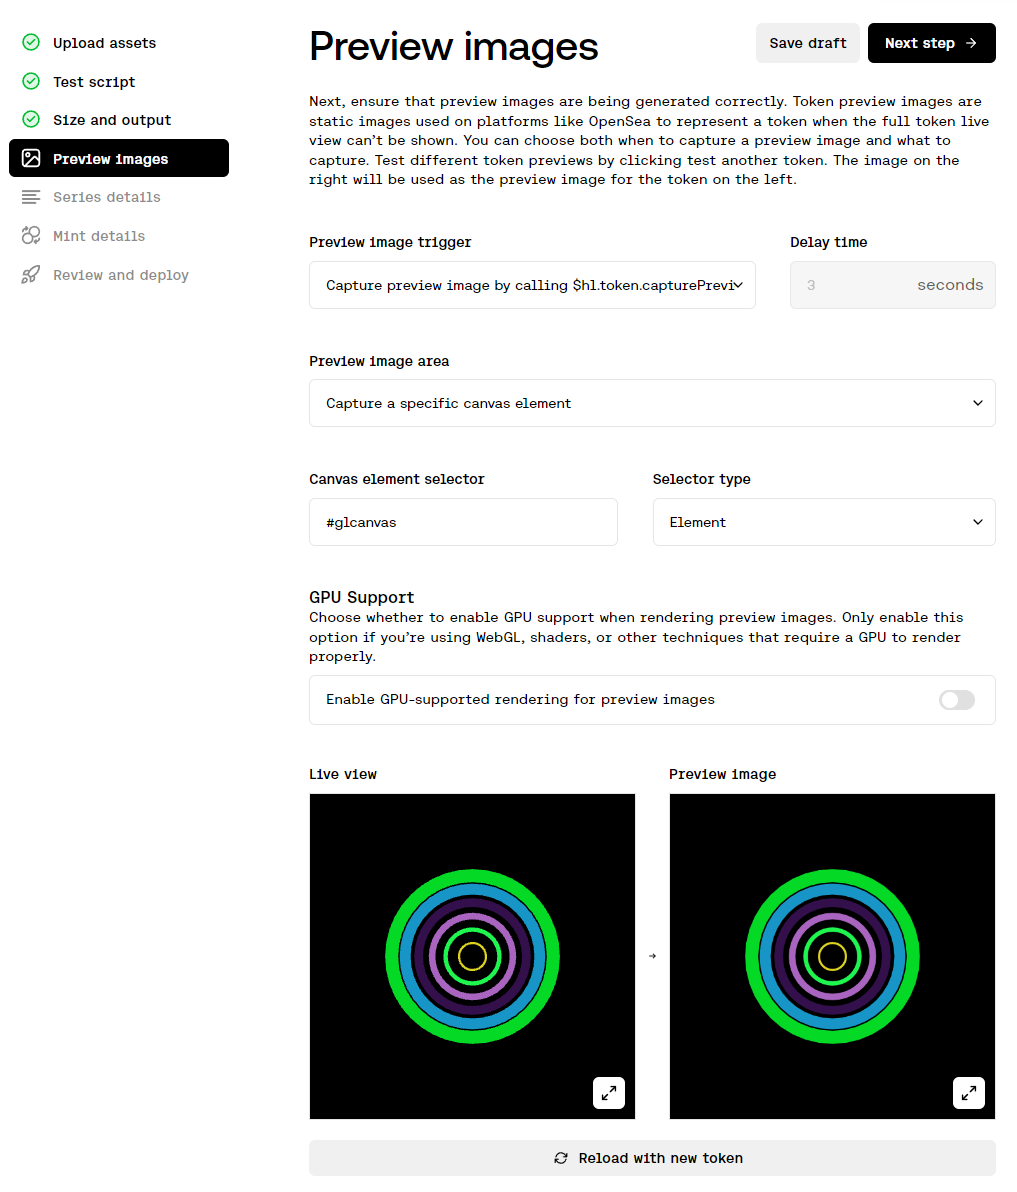
If you are using the Preview image area option called Capture a specific canvas element on the Preview images step, be sure to enter as the Canvas element selector the canvas id that cables.gl automatically creates, which is #glcanvas.
Links
Here is a link to the demo cables.gl patch. Have fun!